
Support mark sanding দিয়ে শুরু হয় না; এটি orientation ও support strategy-তেই নিয়ন্ত্রণ করা হয়। Critical face থেকে touchpoint সরাতে পারলে finishing-এর অর্ধেক কাজ print শুরুর আগেই শেষ।
Resin printing-এ unsupported island বা overhang ধরে রাখতে support প্রয়োজন। প্রতিটি touchpoint model-এর সঙ্গে একটি ছোট connection তৈরি করে; removal-এর সময় সেটি crater, nub বা tear রেখে যেতে পারে। Mark-এর আকার tip diameter ছাড়াও cure state, removal direction এবং local wall thickness-এর ওপর নির্ভর করে।
Goal support পুরো বাদ দেওয়া নয়; minimal কিন্তু reliable support দিয়ে mark এমন জায়গায় রাখা যেখানে চোখে কম পড়ে ও tool সহজে পৌঁছায়। খুব হালকা support দিয়ে failed print হলে surface clean হলেও part পাওয়া যায় না। তাই reliability ও finish-এর balance দরকার।
সংক্ষিপ্ত উত্তর
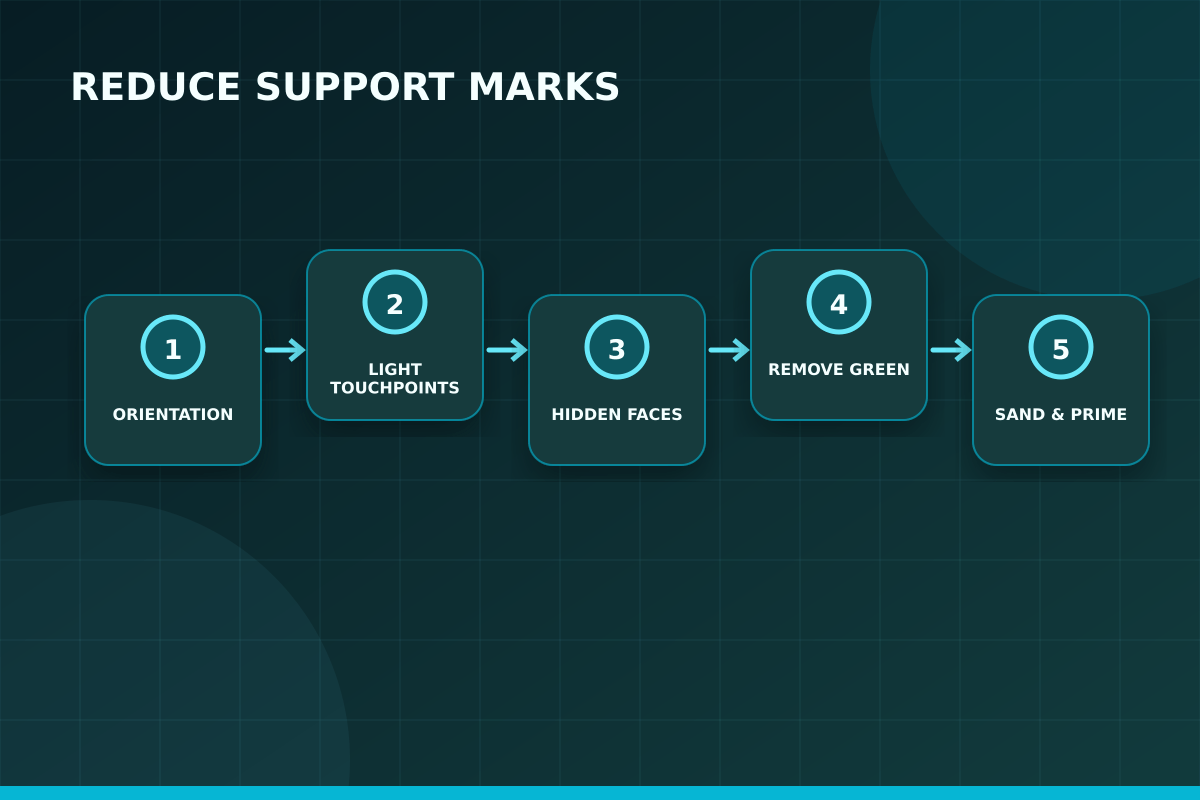
Model tilt করে visible face support থেকে বাঁচান, heavy touchpoint base বা hidden area-তে দিন, light tip শুধু fine island-এ ব্যবহার করুন, support green state-এ controlled cutter দিয়ে সরান এবং প্রয়োজন হলে spot sanding/primer করুন। Auto-support-এর পরে manual review অবশ্যই করুন।
Orientation-ই প্রথম প্রতিরক্ষা
Flat face plate-এর দিকে রাখলে large area একসঙ্গে peel হয় এবং support surface-এ ছড়িয়ে পড়ে। Model tilt করলে cross-section ধীরে বাড়ে এবং support backside/underside-এ নেওয়া যায়। তবে blind “45 degree rule” নেই। Character face, mechanical mating surface, engraved logo বা glossy panel—যে surface সবচেয়ে critical, সেটিকে support ও staircase দুটো থেকে protect করে angle নির্বাচন করুন।
Cost হিসাবেও failed print-এর প্রভাব বড়। শুধু model-এর resin নয়, support, wash liquid, gloves, machine time এবং finishing labour যোগ হয়। তাই preparation-এ কয়েক মিনিট বেশি ব্যয় করে orientation ও support review করা প্রায়ই দ্রুত print শুরু করার চেয়ে লাভজনক।
Visible, Functional ও Hidden Face Map করুন
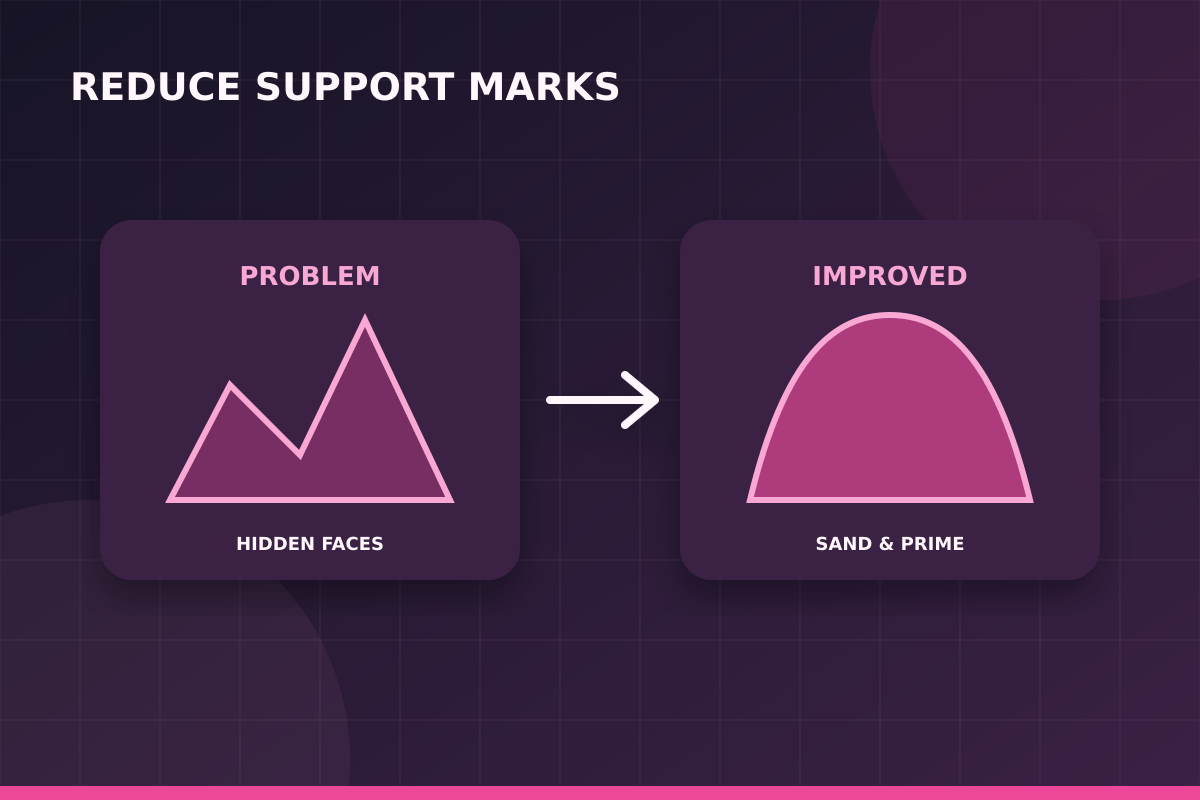
Slicer খোলার আগে model screenshot-এ তিন category mark করুন: A—touch করা যাবে না, B—সামান্য finishing চলবে, C—hidden বা base। Heavy support C area-তে, medium B area-তে এবং A area যতটা সম্ভব clean রাখুন। Functional hole বা seal surface-এ tiny mark-ও fit নষ্ট করতে পারে, তাই শুধু cosmetic visibility নয়।
Resin printing-এ কোনো setting আলাদাভাবে কাজ করে না। Layer height, exposure, lift movement, support এবং model geometry একে অন্যকে প্রভাবিত করে। তাই production model-এ যাওয়ার আগে একই resin, একই room condition এবং একই profile দিয়ে ছোট validation print করা ভালো। এতে failure হলে কারণ চিহ্নিত করা সহজ হয় এবং অপ্রয়োজনীয় resin নষ্ট কমে।
Touchpoint Size ও Support Load
Small tip ছোট mark রাখে কিন্তু load কম নেয়; large tip reliable হলেও crater বড়। Model-এর mass, lever arm ও peel force অনুযায়ী support hierarchy বানান। কয়েকটি strong anchor initial layers ধরে, medium supports body stabilize করে এবং light supports ছোট island ধরে। সব support একই size করলে কোনো জায়গায় excess mark এবং কোনো জায়গায় failure হয়।
প্র্যাকটিক্যাল সিদ্ধান্ত নেওয়ার সময় শুধু screen preview দেখে থেমে গেলে চলবে না। Model-এর visible face, load direction, trapped resin, suction force এবং পরে support removal—সবগুলো ধাপ একসঙ্গে কল্পনা করতে হবে। যে orientation print সফল করে কিন্তু গুরুত্বপূর্ণ face-এ গভীর mark রেখে দেয়, সেটিকে ভালো orientation বলা যায় না।
Island, Suction Cup ও Raft Review
Unsupported island support না পেলে detached resin tank-এ আটকে failure ঘটায়। Cup-like hollow area suction force বাড়িয়ে support bend করতে পারে। Layer preview এক ধাপ করে দেখে নতুন island শুরু কোথায় এবং drain path open কি না যাচাই করুন। Raft removal edge model থেকে দূরে রাখুন; raft ও model একসঙ্গে জোড়া হয়ে গেলে part detach করতেই damage হতে পারে।
একটি নির্ভরযোগ্য workflow হলো একবারে একটি variable পরিবর্তন করা। প্রথম test-এর ছবি, resin batch, temperature, layer height ও exposure লিখে রাখুন। পরের test-এ শুধু একটি parameter বদলান। এতে improvement কোন পরিবর্তনের কারণে হয়েছে বোঝা যায়; একই সঙ্গে ভবিষ্যতের repeat order-এ consistent result পাওয়া সহজ হয়।
Support Tip Shape ও Connection
Spherical বা tapered contact stress distribution বদলায়। Deep penetration tip mark কমায় না; removal-এ material ছিঁড়ে crater করতে পারে। Too-shallow tip print চলাকালে detach হয়। Slicer default resin/scale অনুযায়ী test করা দরকার। Thin wall-এ support সরাসরি টান দিলে wall deform হতে পারে, তাই local reinforcement বা alternate contact location বিবেচনা করুন।
ছোট feature-এর ক্ষেত্রে digital model-এর detail থাকাই যথেষ্ট নয়; printer-এর XY resolution, layer height, resin behavior এবং cleaning method সেই detail বাঁচাতে পারছে কি না সেটিও জরুরি। Design-এর সবচেয়ে পাতলা অংশ printer-এর practical limit-এর কাছাকাছি হলে সামান্য scale increase বা controlled thickening অনেক সময় দৃশ্যমান পার্থক্য তৈরি করে।
কখন Support Remove করবেন
Wash-এর পর green part তুলনামূলক soft থাকলে flush cutter দিয়ে tip-এর কাছে কাটলে mark কম হতে পারে। পুরো support tree একবারে টেনে তুললে surface chunk উঠে আসে। Delicate miniature-এ body ধরে force দেওয়া যাবে না। কিছু resin warm-water softening recommend করতে পারে, কিন্তু manufacturer অনুমোদন ছাড়া heat দিলে deformation বা contamination হতে পারে।
Safety-কে finishing-এর আলাদা বিষয় ভাবা ঠিক নয়। Uncured resin skin contact এড়াতে উপযুক্ত nitrile glove, eye protection ও পরিষ্কার work area দরকার। Resin এবং contaminated cleaning liquid স্থানীয় নিয়ম মেনে dispose করতে হবে; sink বা খোলা জায়গায় ফেলা উচিত নয়। নির্দিষ্ট wash ও cure time সবসময় resin manufacturer-এর নির্দেশনা অনুযায়ী ঠিক করুন।
Spot Finishing: Cut, Fill, Sand
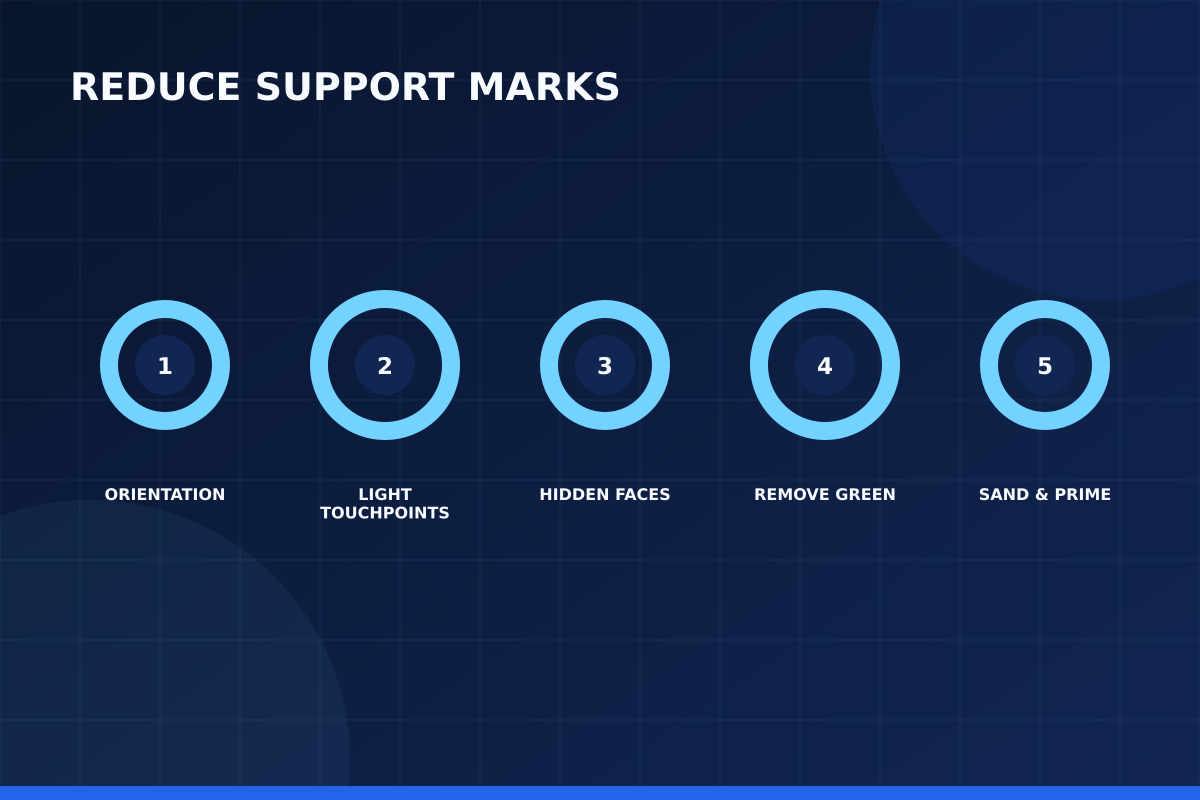
প্রথমে protruding nub sharp flush cutter বা hobby knife দিয়ে level করুন; crater হলে compatible filler দিন। Coarse sanding দিয়ে পুরো texture মুছে না ফেলে 400–800 grit-এর মতো gradual approach model ও resin অনুযায়ী নিন। Wet sanding করলে resin dust কমে, কিন্তু contaminated water safe collect করতে হবে। Final thin primer residual defect দেখাতে সাহায্য করে।
Professional result-এর জন্য “আরও বেশি” সবসময় “আরও ভালো” নয়। বেশি exposure fine gap বন্ধ করতে পারে, বেশি support surface নষ্ট করতে পারে, বেশি cure brittleness বাড়াতে পারে এবং aggressive washing সূক্ষ্ম অংশ ভেঙে দিতে পারে। লক্ষ্য হলো model ও resin অনুযায়ী balanced setting, সর্বোচ্চ setting নয়।
Support Test Coupon ও Repeatability
একটি ছোট coupon-এ বিভিন্ন tip size, penetration ও spacing print করলে আপনার printer-resin combination-এর mark এবং holding strength জানা যায়। Result cure-এর আগে ও পরে compare করুন। Approved support preset save করুন, কিন্তু নতুন geometry-তে blindly apply করবেন না। Resin batch, temperature ও large cross-section support demand বদলাতে পারে।
Batch production-এর আগে একটি approved master sample রাখা কার্যকর। সেই sample-এর dimensions, surface, support marks ও colour দেখে পরবর্তী batch তুলনা করা যায়। একই model আবার print করতে হলে resin ভালোভাবে mix করা, tank inspect করা এবং validated file ব্যবহার করা consistency বাড়ায়।
ধাপে ধাপে Practical Workflow
- Critical surface map করুন।
- Cross-section কমে এমন orientation খুঁজুন।
- Heavy anchor hidden/base area-তে দিন।
- Medium/light support island অনুযায়ী বসান।
- Layer preview-এ unsupported pixel ও suction check করুন।
- Print-wash-dry-এর পরে controlled removal করুন।
- Nub cut, crater fill ও spot sand করুন।
- Primer inspection করে preset note করুন।
দ্রুত সিদ্ধান্তের Checklist
- Face/logo/mating area support-free?
- Initial anchors যথেষ্ট strong?
- সব island supported?
- Hollow cup drain হচ্ছে?
- Cutter access আছে?
- Support removal test করা হয়েছে?
Common Mistakes
- Auto-support দিয়েই print শুরু করা।
- সব tip সবচেয়ে ছোট রাখা।
- Visible face নিচের দিকে দেওয়া।
- পুরো support tree হাতে ছিঁড়ে ফেলা।
- Mark তুলতে detail জুড়ে coarse sanding করা।
প্রায় জিজ্ঞাসিত প্রশ্ন
Support mark পুরোপুরি শূন্য করা যায়?
সব geometry-তে নয়। লক্ষ্য critical surface clean রাখা এবং remaining mark predictable, ছোট ও সহজে finish করা।
Support density কমালেই mark কমবে?
কমতে পারে, কিন্তু remaining support বেশি load নিয়ে বড় mark বা failure তৈরি করতে পারে। Placement ও hierarchy density-এর চেয়ে গুরুত্বপূর্ণ।
Auto-support ভালো কি?
Starting point হিসেবে ভালো। Critical face, island, cup ও tool access manual review ছাড়া production-এ নেওয়া উচিত নয়।
Support cure-এর আগে কাটব?
অনেক model-এ green removal cleaner, তবে flexible thin feature deform হতে পারে। Exact resin ও geometry-তে test করুন।
Crater কীভাবে ঠিক করব?
Loose edge trim করে compatible filler বা spot resin method ব্যবহার করা যায়, তারপর cure ও fine sanding। PPE ও resin guidance মানুন।
Miniature face-এ support পড়লে কী করব?
Orientation বদলে hair/back/base-এ support নিন। মুখে support ছাড়া impossible হলে smallest validated tip ও careful finish ব্যবহার করুন।
বাস্তব প্রয়োগের নোট 1: Orientation-ই প্রথম প্রতিরক্ষা
Flat face plate-এর দিকে রাখলে large area একসঙ্গে peel হয় এবং support surface-এ ছড়িয়ে পড়ে। Model tilt করলে cross-section ধীরে বাড়ে এবং support backside/underside-এ নেওয়া যায়। তবে blind “45 degree rule” নেই। Character face, mechanical mating surface, engraved logo বা glossy panel—যে surface সবচেয়ে critical, সেটিকে support ও staircase দুটো থেকে protect করে angle নির্বাচন করুন। একটি নির্ভরযোগ্য workflow হলো একবারে একটি variable পরিবর্তন করা। প্রথম test-এর ছবি, resin batch, temperature, layer height ও exposure লিখে রাখুন। পরের test-এ শুধু একটি parameter বদলান। এতে improvement কোন পরিবর্তনের কারণে হয়েছে বোঝা যায়; একই সঙ্গে ভবিষ্যতের repeat order-এ consistent result পাওয়া সহজ হয়। এই পর্যবেক্ষণটি Resin Support Marks নিয়ে কাজ করার সময় decision log-এ লিখে রাখলে পরবর্তী print বা production batch-এ একই ভুল পুনরাবৃত্তি হওয়ার ঝুঁকি কমে।
বাস্তব প্রয়োগের নোট 2: Visible, Functional ও Hidden Face Map করুন
Slicer খোলার আগে model screenshot-এ তিন category mark করুন: A—touch করা যাবে না, B—সামান্য finishing চলবে, C—hidden বা base। Heavy support C area-তে, medium B area-তে এবং A area যতটা সম্ভব clean রাখুন। Functional hole বা seal surface-এ tiny mark-ও fit নষ্ট করতে পারে, তাই শুধু cosmetic visibility নয়। ছোট feature-এর ক্ষেত্রে digital model-এর detail থাকাই যথেষ্ট নয়; printer-এর XY resolution, layer height, resin behavior এবং cleaning method সেই detail বাঁচাতে পারছে কি না সেটিও জরুরি। Design-এর সবচেয়ে পাতলা অংশ printer-এর practical limit-এর কাছাকাছি হলে সামান্য scale increase বা controlled thickening অনেক সময় দৃশ্যমান পার্থক্য তৈরি করে। এই পর্যবেক্ষণটি Resin Support Marks নিয়ে কাজ করার সময় decision log-এ লিখে রাখলে পরবর্তী print বা production batch-এ একই ভুল পুনরাবৃত্তি হওয়ার ঝুঁকি কমে।
বাস্তব প্রয়োগের নোট 3: Touchpoint Size ও Support Load
Small tip ছোট mark রাখে কিন্তু load কম নেয়; large tip reliable হলেও crater বড়। Model-এর mass, lever arm ও peel force অনুযায়ী support hierarchy বানান। কয়েকটি strong anchor initial layers ধরে, medium supports body stabilize করে এবং light supports ছোট island ধরে। সব support একই size করলে কোনো জায়গায় excess mark এবং কোনো জায়গায় failure হয়। Safety-কে finishing-এর আলাদা বিষয় ভাবা ঠিক নয়। Uncured resin skin contact এড়াতে উপযুক্ত nitrile glove, eye protection ও পরিষ্কার work area দরকার। Resin এবং contaminated cleaning liquid স্থানীয় নিয়ম মেনে dispose করতে হবে; sink বা খোলা জায়গায় ফেলা উচিত নয়। নির্দিষ্ট wash ও cure time সবসময় resin manufacturer-এর নির্দেশনা অনুযায়ী ঠিক করুন। এই পর্যবেক্ষণটি Resin Support Marks নিয়ে কাজ করার সময় decision log-এ লিখে রাখলে পরবর্তী print বা production batch-এ একই ভুল পুনরাবৃত্তি হওয়ার ঝুঁকি কমে।
বাস্তব প্রয়োগের নোট 4: Island, Suction Cup ও Raft Review
Unsupported island support না পেলে detached resin tank-এ আটকে failure ঘটায়। Cup-like hollow area suction force বাড়িয়ে support bend করতে পারে। Layer preview এক ধাপ করে দেখে নতুন island শুরু কোথায় এবং drain path open কি না যাচাই করুন। Raft removal edge model থেকে দূরে রাখুন; raft ও model একসঙ্গে জোড়া হয়ে গেলে part detach করতেই damage হতে পারে। Professional result-এর জন্য “আরও বেশি” সবসময় “আরও ভালো” নয়। বেশি exposure fine gap বন্ধ করতে পারে, বেশি support surface নষ্ট করতে পারে, বেশি cure brittleness বাড়াতে পারে এবং aggressive washing সূক্ষ্ম অংশ ভেঙে দিতে পারে। লক্ষ্য হলো model ও resin অনুযায়ী balanced setting, সর্বোচ্চ setting নয়। এই পর্যবেক্ষণটি Resin Support Marks নিয়ে কাজ করার সময় decision log-এ লিখে রাখলে পরবর্তী print বা production batch-এ একই ভুল পুনরাবৃত্তি হওয়ার ঝুঁকি কমে।
বাস্তব প্রয়োগের নোট 5: Support Tip Shape ও Connection
Spherical বা tapered contact stress distribution বদলায়। Deep penetration tip mark কমায় না; removal-এ material ছিঁড়ে crater করতে পারে। Too-shallow tip print চলাকালে detach হয়। Slicer default resin/scale অনুযায়ী test করা দরকার। Thin wall-এ support সরাসরি টান দিলে wall deform হতে পারে, তাই local reinforcement বা alternate contact location বিবেচনা করুন। Batch production-এর আগে একটি approved master sample রাখা কার্যকর। সেই sample-এর dimensions, surface, support marks ও colour দেখে পরবর্তী batch তুলনা করা যায়। একই model আবার print করতে হলে resin ভালোভাবে mix করা, tank inspect করা এবং validated file ব্যবহার করা consistency বাড়ায়। এই পর্যবেক্ষণটি Resin Support Marks নিয়ে কাজ করার সময় decision log-এ লিখে রাখলে পরবর্তী print বা production batch-এ একই ভুল পুনরাবৃত্তি হওয়ার ঝুঁকি কমে।
শেষ কথা
Support mark-এর সবচেয়ে কম খরচের সমাধান CAD/slicer stage-এ। Visible surface map, correct orientation এবং graded support system ব্যবহার করলে sanding, filler ও paint labour অনেক কমে।
প্রতিটি resin ও scale-এর জন্য ছোট support coupon রাখা Artin3D-এর মতো repeat production workflow-এ consistent finish অর্জনে কার্যকর।
আপনার model, sample, measurement বা project requirement পাঠালে Artin3D team printability, material, orientation এবং finishing requirement review করে উপযুক্ত solution প্রস্তাব করতে পারে। Artin3D-এর সঙ্গে যোগাযোগ করুন।
Artin3D – Where ideas take shape.


