
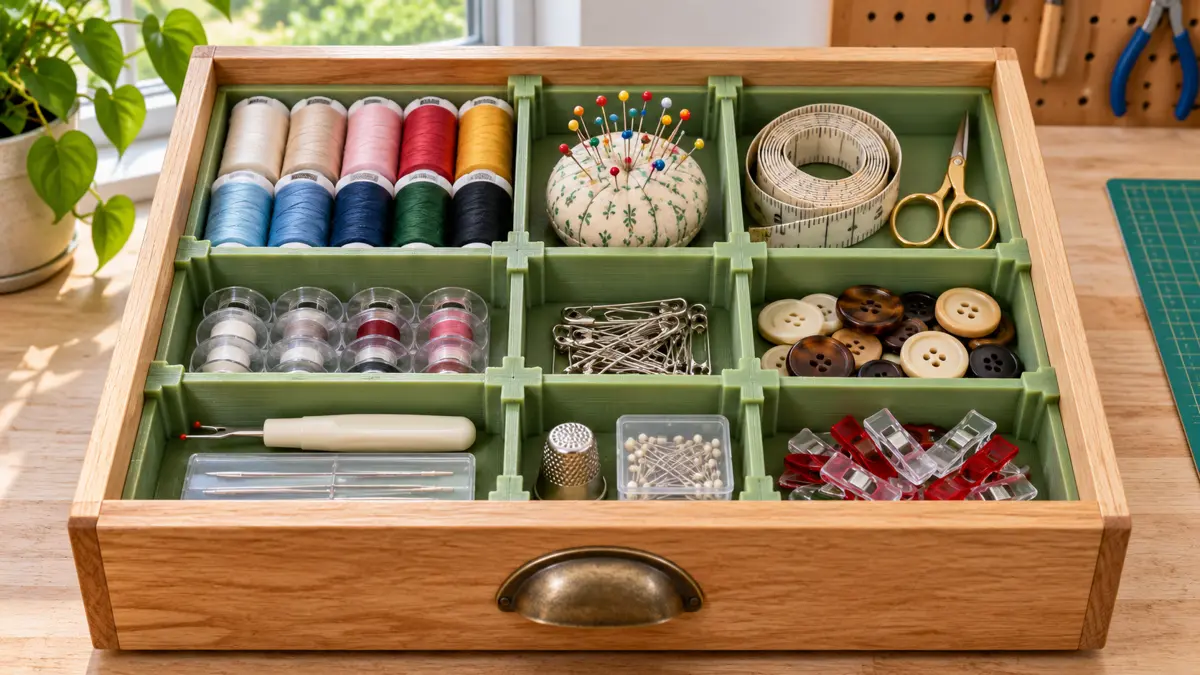
ড্রয়ারের বাঁকা কোণ ও ভেতরের মাপ ধরে খুলে নেওয়া যায় এমন divider বানান। সামনে, মাঝখানে ও পেছনে ড্রয়ারের প্রস্থ নিন। কোন জিনিস তুলতে আঙুল ঢোকাতে হয়, কাগজের নকশাতেই তার জন্য জায়গা রাখুন।
Pull an ordinary drawer all the way open and you may discover that the space at the back is narrower than the front. A perfectly rectangular organiser can jam halfway in while wasting room around the objects you reach for every day. With 3D printed drawer dividers on the ELEGOO Centauri Carbon, you can build an adjustable grid and replace one strip when your collection changes. Begin with the drawer and its contents on the same table.
এই Blog এর Product
ELEGOO Centauri Carbon 3D Printer
বর্তমান মূল্য, specification ও availability দেখতে সরাসরি product page খুলুন।
Record the useful space
Measure inside width at the front, middle and rear, then measure depth on both sides. Trace rounded corners onto paper. Check the drawer while it closes, especially under any rail or apron above the opening. A tall spool that fits comfortably in an open drawer can catch when the drawer travels underneath the desk. Place a strip of card beside the tallest object and trim it until the complete assembly passes freely.
Allocate space by how you pick things up
Arrange the contents directly on a paper outline. Leave room beside a tape measure for a finger and space at the end of a pencil to tip it upward. Small buttons may be easier to collect in a removable cup. Draw dividing lines only after you can pick up every item. Count the strips and intersections on your plan. A shared wall takes less space than placing separate thick boxes next to each other.
Include wall thickness in the arithmetic
Suppose an interior span of 180 mm will contain three equal compartments and two printed walls that each measure 2 mm. That leaves 176 mm for the openings, or roughly 58.7 mm each, before end clearance. If an object is exactly 59 mm wide, a drawing that simply divides 180 by three gives a misleading answer. Use the measured thickness of the test strip when laying out the final grid.
Test one crossing on the printer
Design two short strips with slots cut from opposite edges so they overlap at the crossing. Make their combined height flush when assembled. Print them using the same orientation as your long strips. Slide the pieces together by hand and look along the top edges. If one rises above the other, examine slot depth. If the strips bow apart, check slot width and the thickness near the printed edge.
Fit the grid without forcing the drawer
Start with the longest strip. Lower it into the drawer at the angle you will actually have when the drawer is installed. If it only fits when the drawer is completely removed, consider a two piece strip with an accessible join. Add cross pieces one at a time. Rounded end corners can help a strip clear a curved drawer wall without increasing the gap along the entire row.
Keep only what survives a week of use
Put familiar items back and note what moves when the drawer closes. If the whole grid shifts, a removable pad at the ends may help. If only a narrow tool migrates, shorten its compartment or add a shallow tray. Label the underside of interchangeable strips with their lengths. When a new tool arrives, you can swap one divider and keep the rest of the layout that already works.
আরও পড়ুন Centauri Carbon Replacement Knob: মাপ, Captured Nut ও Fit Test গাইড
Artin3D | Where Ideas Take Shape.
WhatsApp or Call +880 1845 348757
Website www.artin3dbd.com
South Banasree Dhaka 1219


